
24–48 Hour QC That Stops Dye Migration on T Shirts, Toronto Tested
Toronto tested QC for dye migration on T Shirts. Learn the white bleed swatch test, low bleed ink options, and the 24–48 hour hold that catches delayed...
24–48 Hour QC That Stops Dye Migration on T Shirts, Toronto Tested
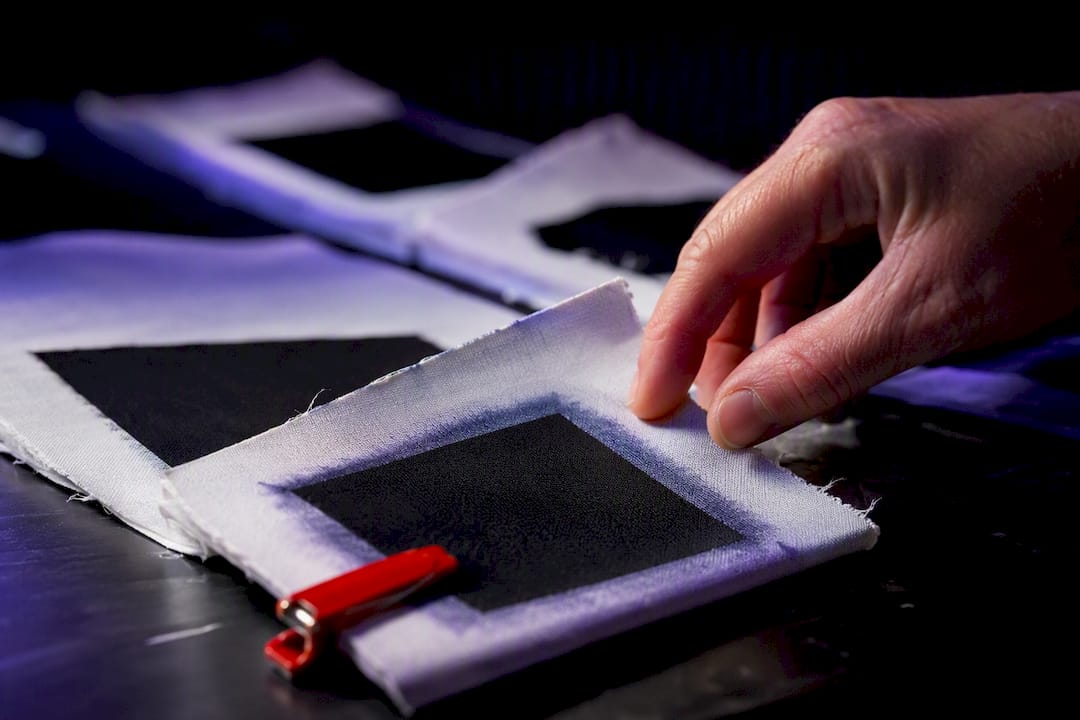
Dye migration happens when heat causes dye in a polyester garment to turn to gas and stain the ink printed on top of it, usually showing up as pink, red, or purple blotching through white or light-colored ink. The single biggest thing you can do to stop it is control your curing heat and test every new garment batch before you run production to ensure high t-shirt quality. Some professional printers build that testing step into their workflow because skipping it is how reprints happen.
TL;DR:
- Polyester fabrics, including blends and sublimated materials, are highly susceptible to dye migration when exposed to temperatures above 265°F.
- Dark colors such as red, maroon, and navy pose the highest risk, with migration sometimes appearing one to two days after printing.
- Testing swatches from each fabric lot and holding test samples for 24 to 48 hours helps identify migration issues before full production.
- Maintaining a low and slow curing process with controlled heat and proper flashing can significantly reduce dye sublimation and gas diffusion.
- When migration occurs, soaking in surfactants or bleach may lift minor stains, but reprints or refunds are often necessary for affected garments.
Table of Contents
- What Causes Dye Migration in T-Shirts?
- Which Fabrics and Colors Carry the Highest Risk?
- What Should You Check Before You Print?
- How Do You Control Heat on the Press?
- How Do You Test for Dye Migration Before Shipping?
- What Do You Do When Migration Shows Up?
- Shop Perspective: How Professional Printers Prevent Migration
- Get Your Garments Tested Before You Commit to a Full Run
- Sources
- FAQ
What Causes Dye Migration in T-Shirts?
Polyester dye starts to sublimate, meaning it converts from a solid into a gas, at roughly 265°F (130°C). Once that gas forms, it moves upward through the fabric and settles into whatever ink film sits on top, discoloring it from underneath as it cools. This is different from dye bleed in the wash or basic sublimation printing. It’s a side effect of curing heat acting on the shirt itself, not the ink.
The sequence runs in three steps:
- Heat pushes fabric dye past its sublimation point.
- The resulting gas diffuses upward through the ink layer.
- The gas cools and re-condenses as pigment trapped inside the ink film.
Plastisol ink is especially vulnerable because it stays somewhat porous even after a full cure, giving migrating dye gas a path to travel through. A denser, well-formulated low-bleed ink resists that penetration far better than a standard plastisol formulated for cotton-only work.
Which Fabrics and Colors Carry the Highest Risk?
Polyester is the obvious culprit, but you don’t need a 100% poly shirt to have a problem. Triblends, 50/50 cotton-poly blends, and any sublimated performance fabric all carry real risk, since even a modest polyester percentage is enough to trigger migration.
Color matters as much as fiber content:
- Deep reds and maroons are the most common offenders.
- Royal blue and navy are close behind.
- Black and dark green cause fewer complaints but aren’t risk-free.
The onset is often delayed. A shirt can look perfectly clean coming off the dryer and still develop visible staining a day or two later, which is why a same-day inspection isn’t a reliable pass/fail check. Shops that hold new SKUs for 24 to 48 hours before shipping catch problems that a quick glance right off the press will miss every time.
What Should You Check Before You Print?
Prepress is where most migration problems get solved cheaply, or missed expensively.
- Pull the garment vendor’s technical data sheet and check for any dye migration warnings specific to that fabric or color.
- Run a white-bleed test on an actual swatch from the batch, not a swatch from a different dye lot.
- Flag or reject garments from suppliers who can’t confirm colorfastness testing, especially on unfamiliar dark poly-blend SKUs.
- Require a signed sample approval before running full production on any high-risk color.
- Rework designs that call for large white fills directly on dark polyester unless you’re planning a blocker underbase from the start.
Vendor quality varies more than most shops assume, and choosing a reliable garment supplier is often the difference between a clean run and a batch of returns.
Pro Tip: Keep a logbook of which garment SKUs have failed white-bleed testing in the past. Dye formulations shift between production runs at the mill, so a garment that passed last year can fail this year without any warning.
How Do You Control Heat on the Press?
Industry guidance converges on one phrase: cure “low and slow.” That means running your dryer at the lowest temperature that still achieves a full cure, rather than cranking heat up to speed through a job. Uneven dryer zones and aggressive flash cures are the most common on-press causes of migration, because both create heat spikes well above what the ink actually needs.
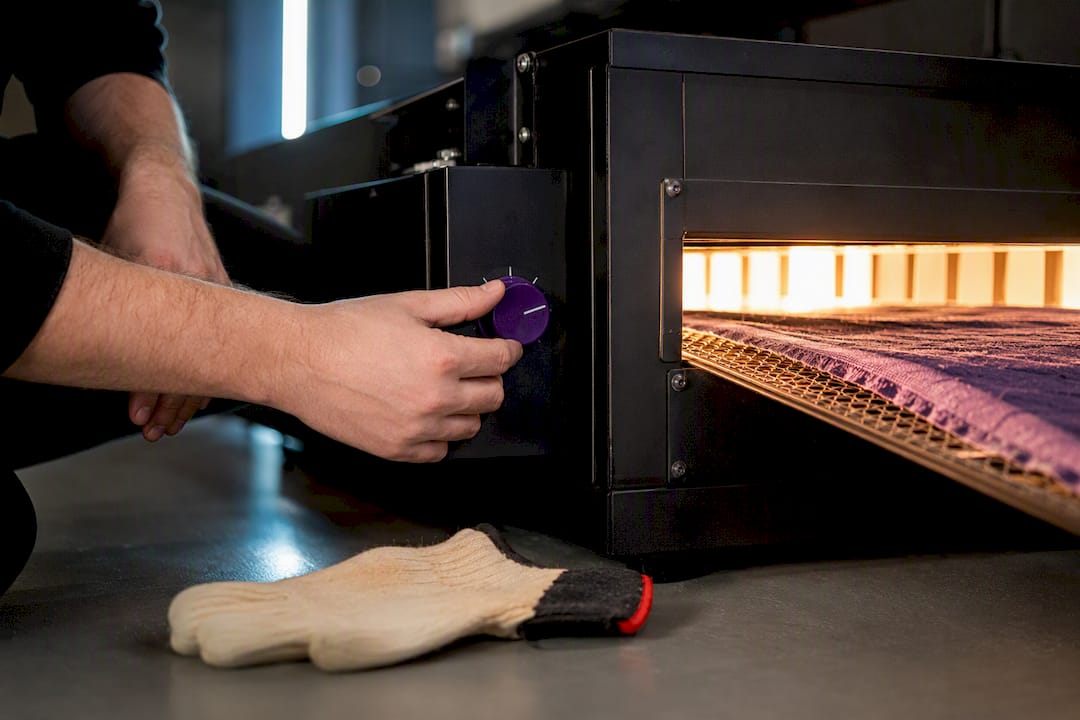
Flash units deserve particular attention. A hot platen is a silent contributor to migration, and the practical test is simple: if a staff member can’t comfortably rest a hand on the platen for a moment, it’s running too hot.
On ink selection:
- Use low-bleed or poly-white inks on any polyester or blend garment.
- Add a blocker underbase on high-risk dark colors, printed with a heavier deposit than you’d use for a standard underbase.
- Confirm each layer is properly flashed before the next pass, since underflashed layers cure unevenly under the final dryer pass.
Pro Tip: *If you’re switching between cotton and poly jobs on the same press day, recheck your flash and dryer settings between runs.
How Do You Test for Dye Migration Before Shipping?
A repeatable test protocol turns migration from a guessing game into a pass/fail checklist.
- Print white ink onto swatches cut from the actual garment batch you’re about to run.
- Cure the swatches using your standard production settings, not a lab setting.
- Hold the swatches at room temperature for one to two weeks, or accelerate the test at 105°F (40°C) for two to five days if you need a faster answer.
- Inspect for pink, red, or purple discoloration against a clean white reference swatch.
- Sample the first five garments of any new SKU, then spot-check roughly one in every 50 afterward.
- Log every result, including pass or fail, cure temperature, and hold time, so you can trace a customer complaint back to a specific batch later.
What Do You Do When Migration Shows Up?
The moment you spot staining, keep the garment wet and set it aside. Letting a stained shirt dry lets the migrated dye set permanently into the ink, closing off most of your remaining options.
Realistic remediation is limited:
- A soak in a surfactant like Synthrapol or a mild oxygen bleach solution can lift some staining, especially if caught early.
- Reductive strippers can work on stubborn cases but carry real risk of damaging the print or the garment color, and belong at the bottom of the list, tested on a spare shirt first.
- Laundry-focused dye transfer inhibitors prevent dye from redepositing during a wash cycle, but they don’t reverse heat-set migration that’s already happened during curing.
For a batch that’s already shipped, the honest move is reprinting the affected garments or issuing a refund, and telling the customer plainly what happened rather than letting them discover it themselves.
Shop Perspective: How Professional Printers Prevent Migration
Most shops that get burned by dye migration weren’t sloppy. They just trusted a garment supplier without verifying the fabric, or shipped orders the same day they came off the dryer. Some shops run sample approvals and documented white-bleed testing on unfamiliar SKUs before committing to a full production run, and hold test prints through the recommended window rather than eyeballing them warm off the press. That single habit, waiting before judging a print finished, catches more problems than any ink upgrade does on its own. It’s a discipline any shop can copy, whether you’re running one heat press or a full production floor.
— Toronto
Get Your Garments Tested Before You Commit to a Full Run
Some printers run pre-production checks on the fabrics most likely to cause dye migration, so you’re not discovering a staining problem after many shirts are already printed. Unlike sending a job to a shop that prints first and troubleshoots later, this process includes garment testing and low-bleed workflows before your order goes into full production, with no minimum order quantity and a fast turnaround once the design is approved.
If you’re printing on a risky dark poly blend, our DTF gang sheet printing options sidestep a lot of the plastisol bleed problem entirely, since transfers sit differently on the fabric than direct screen printing. For bulk team or business orders where a reprint would be expensive, our bulk order services include the QA testing this article walks through. Request a sample test or a quote today and find out before production, not after, whether your garment choice is going to cause problems.
Sources
- Specialty Inks dye migration technical bulletin — Avient Specialty Inks
- Screenprinting
- How to control dye migration — Screen Printing Magazine
FAQ
How Do You Stop Dye Migration on T-Shirts?
Control your curing and flash heat so you’re never spiking above what’s needed for a full cure, and use low-bleed or poly-white ink with a blocker underbase on high-risk dark polyester colors. Testing every new garment SKU with a white-bleed swatch test before full production catches problems a heat gun alone won’t reveal.
Can You Remove Dye Transfer From a Shirt After It Happens?
Sometimes, if you catch it early and keep the garment wet rather than letting it dry. A soak in a surfactant like Synthrapol or a mild oxygen bleach can lift light staining, though reductive strippers, while sometimes effective, risk further damage and should be tested on a spare garment first.
How Long Does Dye Migration Take to Show Up?
Migration can appear within hours, but it often takes a day or two to fully develop, which is why shops hold test prints 24 to 48 hours before final acceptance. Inspecting a shirt right off the dryer and calling it clean is one of the most common mistakes in the industry.
What Exactly Is Dye Migration in Screen Printing?
Dye migration is when heat causes dye inside a polyester or poly-blend fabric to sublimate into a gas that rises and discolors the ink printed on top, typically starting around 265°F (130°C). It shows up most often as pink or purple blotching on white ink over dark red, maroon, or navy garments.
Does Toronto Custom T-Shirts Test Garments for Dye Migration Risk?
Yes, sample approvals and white-bleed testing are part of the standard prepress process for unfamiliar or high-risk garment colors before a full production run begins. Current pricing for custom apparel and DTF services is listed on the Toronto Custom T-Shirts site.
Recommended
Get pricing in 24h.
Toronto-based, no minimums. Tell us about your project and we'll email a detailed quote within one business day.
Request a Quote