Photo Printing on Shirts: Methods, File Prep, and Results
Discover what is photo printing on shirts and learn methods, file prep, and optimal results for your custom designs. Click to explore!
Photo Printing on Shirts: Methods, File Prep, and Results
Photo printing on shirts means applying a photographic image to fabric using digital or heat-transfer processes. The main methods are DTG (direct-to-garment), DTF (direct-to-film), dye sublimation, heat-transfer paper, and heat-transfer vinyl (HTV). Each one suits a different fabric, budget, and quantity.
The single-line decision rule most people need:
- Cotton or cotton-blend shirt with a photo? Use DTG or DTF for professional results, or iron-on transfer paper for a one-off at home.
- 100% polyester shirt? Sublimation is the right call. It bonds dye directly into the fiber and lasts a long time when done correctly.
- Simple design, small quantity, dark shirt? DTF handles dark fabrics without the polyester requirement. HTV works for basic shapes but struggles with photographic detail.
Torontocustomtshirts handles all of these methods professionally, which matters when the fabric or design complexity pushes past what a home setup can reliably deliver.
Table of Contents
- What are the main photo printing methods for shirts?
- Which printing method should you choose?
- How do you prepare your photo file for shirt printing?
- How do you print a photo on a shirt at home?
- When does a professional printer make more sense?
- Which fabrics work best, and how do you care for printed shirts?
- Why do photo prints fail, and how do you fix them?
- What do print professionals know that most guides skip?
- Key Takeaways
- The method-first mindset most people skip
- Get your photo printed on a shirt by Torontocustomtshirts
- Where to read more about shirt photo printing
What are the main photo printing methods for shirts?
Six methods dominate the custom apparel space. They differ in how ink reaches the fabric, which fabrics they work on, and what kind of detail they can reproduce.
Direct-to-garment (DTG)
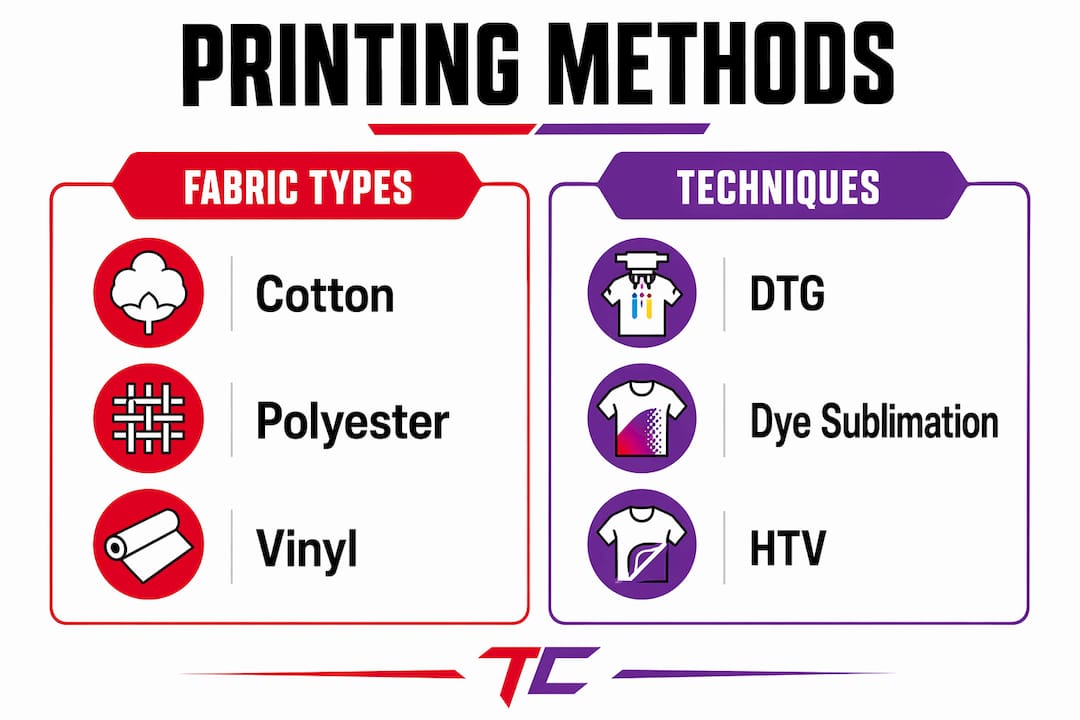
DTG printing sprays water-based inks directly onto fabric using a specialized inkjet printer. It handles photorealistic images well, supports white ink for dark garments, and works best on natural fibers like cotton. The catch: it requires pretreatment of the garment and a curing step (heat press or conveyor dryer) to fix the inks permanently. Without those steps, the print fades fast.
Direct-to-film (DTF)
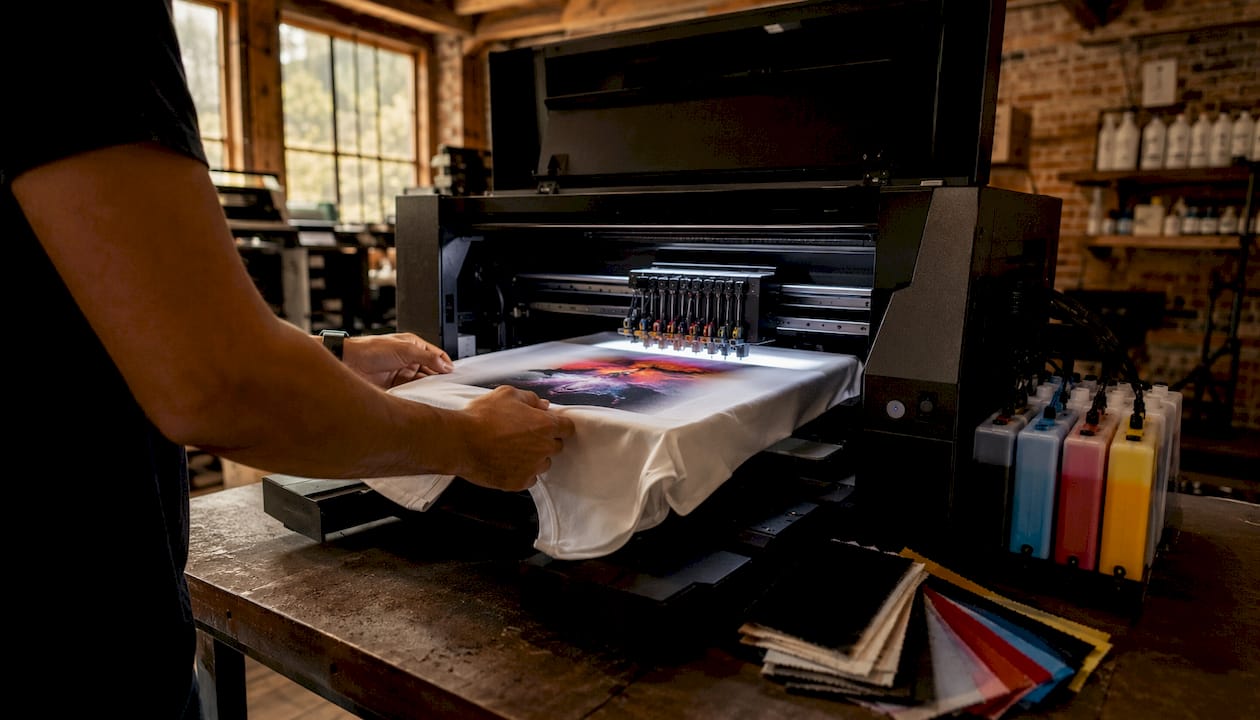
DTF prints the design onto a transfer film, adds a hot-melt adhesive powder, cures it, then heat-presses the finished film onto the shirt. The result is photorealistic on both light and dark shirts, and it works across cotton, polyester, blends, and even nylon. No pretreatment required. That flexibility makes DTF the go-to for shops handling mixed-fabric orders.
Dye sublimation
Sublimation forces dye into polyester fibers under heat and pressure. The dye becomes part of the fabric rather than sitting on top of it, which is why the hand-feel stays soft and the color stays vivid. The hard limit: it only works on polyester or specially coated substrates. On cotton, the dye has nothing to bond with and the image washes out almost immediately.
Heat-transfer paper
Print your image on special transfer paper with an inkjet printer, then iron or heat-press it onto the shirt. Light-sheet papers work on white or light-colored fabrics. Dark-sheet papers include a white backing layer so colors show up on dark shirts, but that backing is visible and changes the feel of the fabric. Durability runs for a limited number of washes before the image starts cracking or peeling.
Heat-transfer vinyl (HTV)
HTV involves cutting or printing a design onto vinyl, weeding away the excess, then pressing it onto the garment. Printable HTV can handle simple photos, but fine photographic detail gets lost. It works on most fabrics and is genuinely beginner-friendly. For a photo with gradients, shadows, or complex color, it falls short.
Screen printing
Screen printing excels at bold, flat graphics in a limited color palette. For photos, it requires a halftone conversion and loses fine detail. It becomes cost-effective at higher quantities (typically 24+ shirts) because of the setup cost per color. For photorealistic images, DTG or DTF is the better choice.
Pro Tip: Fabric composition is the first decision, not the last. A cotton shirt rules out sublimation entirely. A polyester shirt makes DTG ink adhesion unreliable. Nail the fabric first and the method choice follows naturally.
Which printing method should you choose?
| Method | Best for | Best fabric | Image quality | Durability | Cost shape | DIY-friendly? |
|---|---|---|---|---|---|---|
| DTG | Photorealistic detail, small runs | 100% cotton | Excellent | Good with curing | Low setup, moderate per-shirt | No (needs industrial printer) |
| DTF | Dark shirts, mixed fabrics, versatility | Most fabrics | Excellent | Very good | Low-moderate setup, moderate per-shirt | Limited (film printing is complex) |
| Sublimation | Full-coverage photo, sportswear | 100% polyester | Excellent | Outstanding (50+ washes) | Moderate setup, low per-shirt at volume | Possible with dedicated printer |
| Heat-transfer paper | One-off gifts, home use | Light or dark cotton/blends | Moderate | Low (20–40 washes) | Very low setup | Yes (inkjet + iron) |
| HTV | Simple designs, small runs | Most fabrics | Low for photos | Moderate | Low setup | Yes |
| Screen printing | Bulk orders, simple graphics | Cotton, blends | Low for photos | High | High setup, low per-shirt at volume | No |
Three quick decision rules cover most situations:
- Single cotton shirt with a photo: DTG from a pro shop, or iron-on transfer paper at home for a one-time gift.
- Full-coverage photo on a polyester jersey or sports shirt: Sublimation, no question.
- Dark shirt, photorealistic image, no polyester requirement: DTF is the most reliable path, whether DIY or professional. For a deeper look at how DTF compares to other methods, the DTF vs screen printing breakdown covers the trade-offs clearly.
How do you prepare your photo file for shirt printing?
A sharp, well-prepared file is the difference between a crisp print and a blurry, color-shifted disappointment. These are the specs that actually matter.
Resolution
Aim for 300 dpi at the intended print size for the sharpest results. 150 dpi is the practical minimum. To translate: a 10" × 10" print at 300 dpi requires a 3,000 × 3,000 pixel image. Pulling a small JPEG from a website and scaling it up will not work. Start with the highest-resolution version of the photo you have.
File types
- PNG with transparency: Best for designs with no background or complex edges. Transparency prevents white boxes appearing around your image.
- TIFF: Lossless, preferred by professional print shops for maximum detail.
- High-quality JPEG: Acceptable when the compression is minimal (quality 90+ in Photoshop or equivalent). Avoid heavily compressed JPEGs — compression artifacts print visibly.
Color profile
Use sRGB unless the print shop specifically requests CMYK or another profile. Most DTG and DTF workflows convert to their own color space internally, and sRGB gives them the most accurate starting point. Embed the color profile in the file before sending it. Colors on screen and colors on fabric never match perfectly, so request a digital proof or physical sample for anything where color accuracy matters.
Sizing and safe area
Size your image to the actual print dimensions, not larger. Leave at least a 0.25" margin from the edge of the print area so nothing gets clipped. For full-bleed designs (sublimation especially), confirm the exact print boundaries with your shop.
File-prep checklist:
- Crop to final composition before export
- Confirm pixel dimensions match the DPI and print size target
- Flatten layers and merge any adjustment layers
- Mirror the image horizontally if using transfer paper or most HTV processes (text and logos will read backward otherwise)
- Embed the sRGB color profile
- Save a separate print-ready copy — never work from the only copy
Pro Tip: Pre-press the shirt for 5 seconds before applying any transfer. It removes moisture and wrinkles, giving the transfer a flat, dry surface to bond to. Skipping this step is one of the most common causes of adhesion failure and ghosting.
How do you print a photo on a shirt at home?
Home printing works best for one-off gifts or small personal runs. Two methods are genuinely accessible: inkjet iron-on transfer paper and printable HTV. Sublimation at home is possible but has real constraints.
Inkjet iron-on transfer paper: step-by-step
Equipment: Standard inkjet printer, iron-on transfer paper (light or dark sheet depending on shirt color), household iron or heat press.
- Choose the correct transfer paper for your shirt color (light-sheet for white/light shirts, dark-sheet for dark shirts).
- Open your image in any photo editor and mirror it horizontally before printing. This is non-negotiable for text and asymmetrical designs.
- Print at the highest quality setting your printer allows. Use the paper manufacturer’s recommended settings.
- Pre-press the shirt for 5 seconds to remove moisture and flatten the surface.
- Place the transfer face-down on the shirt. Apply firm, even pressure with the iron or heat press. Follow the paper manufacturer’s time and temperature — typically 350–375°F for 15–20 seconds with a heat press.
- Peel the backing while hot (hot-peel paper) or let it cool completely first (cold-peel paper). Check the packaging — peeling at the wrong temperature tears the image.
- Let the shirt cool flat for at least 24 hours before washing.
A household iron gives inconsistent pressure and heat distribution compared with a heat press. For more than a handful of shirts, a basic heat press ($150–$300) pays for itself quickly in fewer ruined transfers.
Printable HTV: step-by-step
- Print your design onto printable HTV using an inkjet printer (check that your HTV brand is inkjet-compatible).
- Let the ink dry fully — at least 30 minutes.
- Cut around the design, leaving a small border.
- Weed away any excess vinyl outside the design area.
- Place the HTV design-side down on the shirt and press at the manufacturer’s recommended settings (typically 305–320°F for 10–15 seconds).
- Peel the carrier sheet per the manufacturer’s instructions (hot or cold peel varies by brand).
Home sublimation: what you need to know
Sublimation at home requires a dedicated sublimation printer loaded with sublimation ink. A standard inkjet printer will not work. The shirt must be 100% polyester (or a high-poly blend) and ideally white or light-colored, because sublimation cannot print white ink and dark backgrounds mute the colors. The process itself is straightforward once the equipment is in place, but the upfront cost and the polyester-only limitation make it less practical for casual home use than transfer paper.
Warnings to keep in mind:
- Low-quality transfer paper produces dull colors and peels faster.
- Forgetting to mirror the image is the most common beginner mistake.
- Iron-on transfers typically last 20–40 washes before visible degradation.
- The feel of a transfer on the shirt is noticeably different from DTG or sublimation — there is a film layer you can feel.
For readers who want clean, durable results without the equipment investment, the single shirt printing guide covers professional one-off options in detail.
When does a professional printer make more sense?
Some situations make DIY the wrong call, and it has nothing to do with skill.
Go professional when:
- You need more than a handful of shirts and consistency matters across the run.
- The design is photorealistic on a dark or mixed-fabric shirt — DTG and DTF from a pro shop produce results that home transfers cannot match.
- You are selling or gifting shirts where durability reflects on you.
- Color accuracy is critical (brand colors, skin tones in portraits).
- You want a sample proof before committing to a full run.
What a professional shop does differently: Industrial DTG printers pretreat garments with a polymer solution that improves ink adhesion, then cure the print in a conveyor dryer at controlled time and temperature. That curing process is what gives professional DTG prints their durability. Home setups cannot replicate it reliably.
Questions worth asking any print shop:
- What printing method do you use for photographic images?
- Do you pretreat garments for DTG?
- What is the expected wash durability for this method and ink?
- What is the minimum order quantity?
- Can I get a digital proof or physical sample before the full run?
- What is the turnaround time?
Ballpark costs and timelines:
- Single custom shirt (DTG or DTF, professional): roughly $25–$45 depending on complexity and shop.
- Small run (6–12 shirts): per-shirt cost drops noticeably; expect $18–$30 per shirt.
- Bulk orders (24+ shirts): per-shirt cost falls further; screen printing becomes competitive for simple designs at this scale.
- Turnaround: most professional shops deliver in 3–7 business days for standard orders; rush options are usually available.
For bulk photo shirt orders, volume pricing changes the math significantly.
Which fabrics work best, and how do you care for printed shirts?
Fabric choice and washing habits are the two biggest factors in how long a photo print lasts.
Fabric compatibility
- 100% cotton: Best for DTG. The water-based inks bond well to natural fibers. Also works with heat-transfer paper and HTV.
- 100% polyester: Required for sublimation. DTG ink adhesion on polyester is unreliable without special pretreatment.
- Cotton/poly blends: DTF handles blends well. DTG works on high-cotton blends (50%+ cotton) with pretreatment. Sublimation on blends produces washed-out color.
- Dark fabrics: DTF and DTG (with white ink underbase) both handle dark shirts. Sublimation on dark polyester produces muted results because the dye cannot override the base color.
Hand-feel differences
DTG, DTF, and HTV prints sit on top of the fabric to varying degrees. You can feel the ink or film layer, especially on DTG prints with a heavy white underbase. Sublimation has zero hand-feel because the dye is inside the fiber. For athletic or fitted garments where feel matters, sublimation on polyester is the clear winner.
Care instructions to extend print life
- Wash inside-out in cold water.
- Use a mild detergent. Avoid bleach entirely.
- Tumble dry on low heat or air-dry flat.
- Never iron directly on the print. If ironing is needed, use a pressing cloth and apply heat to the reverse side.
- Skip fabric softener — it degrades ink adhesion over time.
- For the first wash after a home transfer, wait at least 24 hours after pressing.
Sublimation prints hold up the longest under regular washing. Iron-on transfers typically last 20–40 washes before visible degradation. DTG and DTF prints from a professional shop with proper curing fall in between, lasting well with correct care.
Why do photo prints fail, and how do you fix them?
Most print failures trace back to one of four causes. Knowing which one you are dealing with points directly to the fix.
| Problem | Likely cause | Fix or prevention |
|---|---|---|
| Cracking or peeling | Wrong transfer paper for fabric, or insufficient heat/pressure | Use the correct paper type; use a heat press over an iron; pre-press the shirt |
| Fading after washing | Poor curing (home iron) or low-grade ink | Cure with a heat press at correct temp/time; use quality transfer paper |
| Ghosting (blurry double image) | Movement during pressing | Tape the transfer in place; press in one firm motion without sliding |
| Poor detail or pixelation | Low DPI source image or heavy JPEG compression | Start with a 300 dpi image; avoid re-saving JPEGs multiple times |
| White backing visible (dark shirts) | Light-sheet paper used on dark fabric | Switch to dark-sheet transfer paper or use DTF |
Prevention checklist:
- Confirm the paper or film type matches the shirt color and fabric.
- Pre-press the shirt for 5 seconds before applying the transfer.
- Mirror the image for all transfer-paper and most HTV processes.
- Set the correct heat, pressure, and time for the specific material — do not guess.
- Use a heat press when printing more than two or three shirts.
When to reprint vs. troubleshoot: If the image is cracked or peeling at the edges after the first wash, reprinting with corrected settings is faster than trying to repair it. If the issue is ghosting or poor adhesion on an otherwise intact print, a spot re-press with a cover sheet (a piece of parchment paper or a Teflon sheet) at the correct temperature can sometimes reactivate the adhesive and improve adhesion.
Pro Tip: Pros use a Teflon cover sheet on every press. It distributes heat evenly, prevents scorching, and protects the print surface. A silicone pad underneath the shirt does the same for pressure consistency. Neither costs much, and both eliminate a significant percentage of common failures.
What do print professionals know that most guides skip?
The research-backed rules that separate reliable results from frustrating failures are mostly about process, not equipment.
Start with fabric, always. Choosing the wrong method for the fabric is the single most frequent cause of transfer failure across the industry. Sublimation on cotton looks fine off the press and washes out in two cycles. DTG on polyester without proper pretreatment peels. The method-fabric match is not a preference — it is a technical requirement.
Pre-press is not optional. A 5-second pre-press removes moisture and wrinkles from the shirt before any transfer is applied. Moisture under a transfer creates steam during pressing, which lifts the adhesive and causes ghosting or bubbling. Pros do this on every single shirt.
Durability by method, in real terms: Sublimation prints regularly survive 50+ washes with no visible degradation. Professional DTG and DTF prints with proper curing last well with correct care. Home iron-on transfers typically show cracking or fading after 20–40 washes. That gap matters for anything beyond a one-time gift.
The dark-cotton scenario: A photorealistic image on a dark cotton shirt is the most common request and the trickiest to execute at home. The research-backed route: DTG with a white ink underbase (professional shop only) or DTF transfer. Both preserve detail and color on dark fabric. Iron-on dark-sheet paper works for a single use but the white backing changes the look and feel of the print significantly.
Pro Tip: Before sending a file to any print shop, ask them to confirm the color profile they work in and whether they want sRGB or CMYK. Shops that can answer that question clearly are the ones whose output will match what you expect.
Key Takeaways
Fabric composition determines the right printing method, and getting that match right is the single most important decision in the entire custom photo shirt printing process.
| Point | Details |
|---|---|
| Match method to fabric | Use DTG or DTF for cotton; sublimation for 100% polyester; HTV or transfer paper for simple home runs. |
| File resolution matters | Prepare images at 300 dpi at the intended print size; 150 dpi is the minimum for acceptable results. |
| Mirror transfers before printing | Always flip the image horizontally for transfer paper and most HTV processes to avoid reversed text and designs. |
| Care extends print life | Wash inside-out in cold water, skip bleach and fabric softener, and avoid direct heat on the print surface. |
| Torontocustomtshirts for pro results | For photorealistic prints on cotton or dark shirts, Torontocustomtshirts offers professional DTF and DTG printing with local pickup in Mississauga and across the GTA. |
The method-first mindset most people skip
Most guides lead with the tools. The better starting point is the fabric sitting in front of you. Every time a print fails, the cause traces back to a mismatch between method and material, not a lack of equipment or effort. Sublimation on cotton, DTG on polyester without pretreatment, iron-on paper on a textured blend — these are predictable failures, and they happen because people choose the method they already have rather than the one the fabric requires.
The other thing worth saying plainly: home transfers are genuinely good for one-off gifts. A photo on a shirt for a birthday or a family reunion does not need to survive 60 washes. But if the shirt is for a team, a brand, or anything that needs to hold up over time, the gap between a home iron-on and a professionally cured DTG or DTF print is not subtle. The pretreatment, the industrial press, the controlled cure — those steps exist because they make a measurable difference in how long the print lasts.
The practical takeaway: know what you are making the shirt for before you choose the method. A one-off gift and a uniform for a sports team are not the same problem, and treating them the same way is where most people go wrong.
Get your photo printed on a shirt by Torontocustomtshirts
Torontocustomtshirts prints photorealistic images on shirts using full-color DTF and DTG methods, with no minimum order requirement for single shirts and volume pricing for bulk runs. The difference from a home transfer is immediate: professional pretreatment, industrial pressing, and controlled curing produce prints that hold up wash after wash, on cotton, blends, and dark fabrics alike.
Whether you need one custom shirt or a full team order, the process is straightforward: upload your file, confirm the garment and print specs, and pick up locally in Mississauga or across the GTA. Torontocustomtshirts also provides print-ready artwork support if your file needs adjustments before it goes to press.
Start your custom shirt order or check bulk order pricing if you are planning a larger run.
Where to read more about shirt photo printing
These sources go deeper on the technical side of custom photo shirt printing:
- What is DTG printing and how does it work — Printful’s technical breakdown of the DTG process, pretreatment, and curing.
- Sublimation vs. DTG — Side-by-side comparison of durability, fabric fit, and color performance.
- How to put a picture on a shirt — Shopify’s overview of DTF, sublimation, and home transfer options.
- How to transfer a photo onto a t-shirt at home — Step-by-step home transfer guide with DPI guidance and peel instructions.
- Does your design need mirroring? — Clear explanation of when and why to flip your image before printing.
- Converting photos into printable artwork — Guidance on preparing photos for apparel printing, from file prep to final output.
- Torontocustomtshirts — custom apparel printing in Toronto and the GTA — Local professional printing with DTF, DTG, and pickup options across Mississauga and the GTA.
Recommended
Get pricing in 24h.
Toronto-based, no minimums. Tell us about your project and we'll email a detailed quote within one business day.
Request a Quote