DTF Printing Full Color Design: The Complete 2026 Guide
Discover how to achieve stunning results with DTF printing full colour design. This complete 2026 guide teaches you the essentials for vibrant prints.
DTF Printing Full Color Design: The Complete 2026 Guide
DTF printing, or Direct-to-Film printing, is defined as a transfer method that delivers photorealistic, full-color designs on almost any fabric without pre-treatment or expensive screen setup. The process supports unlimited colors, gradients, and fine details on black, navy, white, and blended fabrics alike, thanks to a built-in white underbase layer. For businesses and individuals pursuing custom apparel or merchandise, dtf printing full color design is the most flexible and cost-effective path to professional-grade results. Mastering it requires the right artwork setup, calibrated equipment, and a disciplined finishing workflow.
What does DTF printing full color design require to get started?
Full-color DTF printing depends on five core components working together: a DTF printer, white ink, hot-melt adhesive powder, a curing oven, and a heat press. Missing or misconfigured any one of these breaks the chain. The printer lays down CMYK color layers first, then deposits a white ink underbase. The powder bonds the transfer to fabric during the heat press stage.
Artwork specs are just as critical as hardware. Professional DTF artwork requires a minimum resolution of 300 DPI at a 1:1 print scale, exported as PNG or TIFF with a transparent background. Lines must be at least 0.2mm thick for the adhesive to bond correctly. Text must be converted to outlines before export to prevent font rendering errors.
Color profile selection determines whether your screen colors survive the print process. Embedding the Coated FOGRA39 color profile in your artwork export tells industrial printers exactly how to map each color from screen to film. Without it, colors shift unpredictably between what you see on screen and what lands on the shirt.
| Component | Specification |
|---|---|
| Resolution | 300 DPI minimum at 1:1 scale |
| File format | PNG or TIFF with transparent background |
| Color profile | CMYK, Coated FOGRA39 embedded |
| Line thickness | 0.2mm minimum |
| Text | Converted to outlines |
| Equipment | DTF printer, white ink, adhesive powder, curing oven, heat press |
Pro Tip: Run a test print on plain paper before committing to film. It catches color profile mismatches and resolution issues before you waste materials.
How do you prepare artwork for vibrant full-color DTF designs?
Artwork preparation is where most full-color DTF projects succeed or fail. The single biggest mistake is working in RGB and exporting without converting to CMYK. RGB screen colors and CMYK print colors behave differently. Neon blues and electric greens that look vivid on a monitor often print as dull, muddy tones without proper color management and proofing.
Follow these steps to set up artwork correctly:
- Set your workspace to CMYK color mode from the start, not as a last-step conversion.
- Embed the Coated FOGRA39 profile in your document settings before designing.
- Use a transparent background at 0% opacity. Any residual white pixels create a visible halo around your design on dark fabrics.
- Keep all line elements at 0.2mm thickness or greater. Thinner lines lose adhesive contact and peel early.
- Convert all text layers to outlines before export to lock letterforms in place.
- For photographic images, use high-resolution source files and apply soft-proofing in Adobe Photoshop or Affinity Photo to preview how colors will shift in CMYK.
- Export as PNG with transparency preserved, or TIFF for maximum color depth.
Gradients and photographic images work exceptionally well in DTF because the process supports continuous tone printing. A sunset gradient or a detailed portrait transfers cleanly without banding, which is a major advantage over screen printing. The key is starting with a high-resolution source file. Upscaling a low-resolution image to 300 DPI does not add real detail. It only makes the blur larger.
Transparent backgrounds with 0% opacity and clean masking are non-negotiable for professional results on dark textiles. Residual white pixels confuse the printer’s white underbase application and produce unwanted borders around the design.
Pro Tip: Use soft-proofing in your design software with the Coated FOGRA39 profile active before finalizing any artwork. What you see in soft-proof mode is much closer to what will actually print.
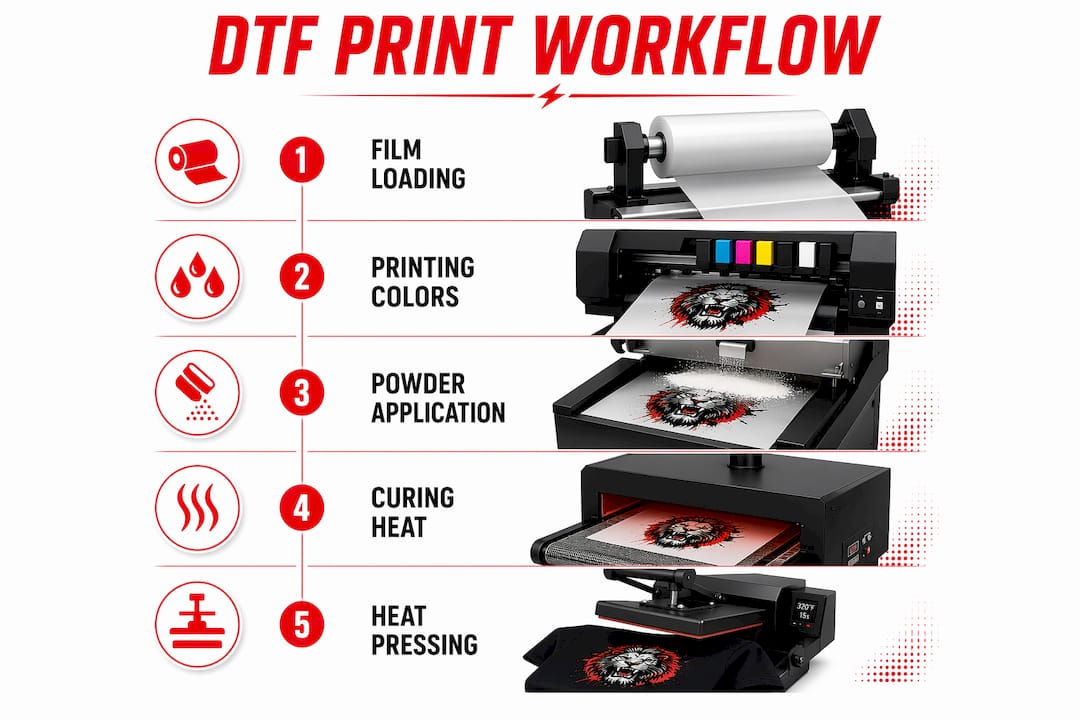
What is the step-by-step DTF printing and heat press workflow?
The DTF workflow has six distinct stages. Each one affects the final result. Skipping or rushing any stage produces prints that peel, crack, or fade prematurely.
- Load the film. Feed DTF film into the printer with the coated side facing the printhead. Follow your printer’s RIP software settings for film type and ink density.
- Print color layers, then white. The printer lays down CMYK color layers first, then deposits the white ink underbase on top. This sequence is the reverse of what you might expect, but it is correct for DTF.
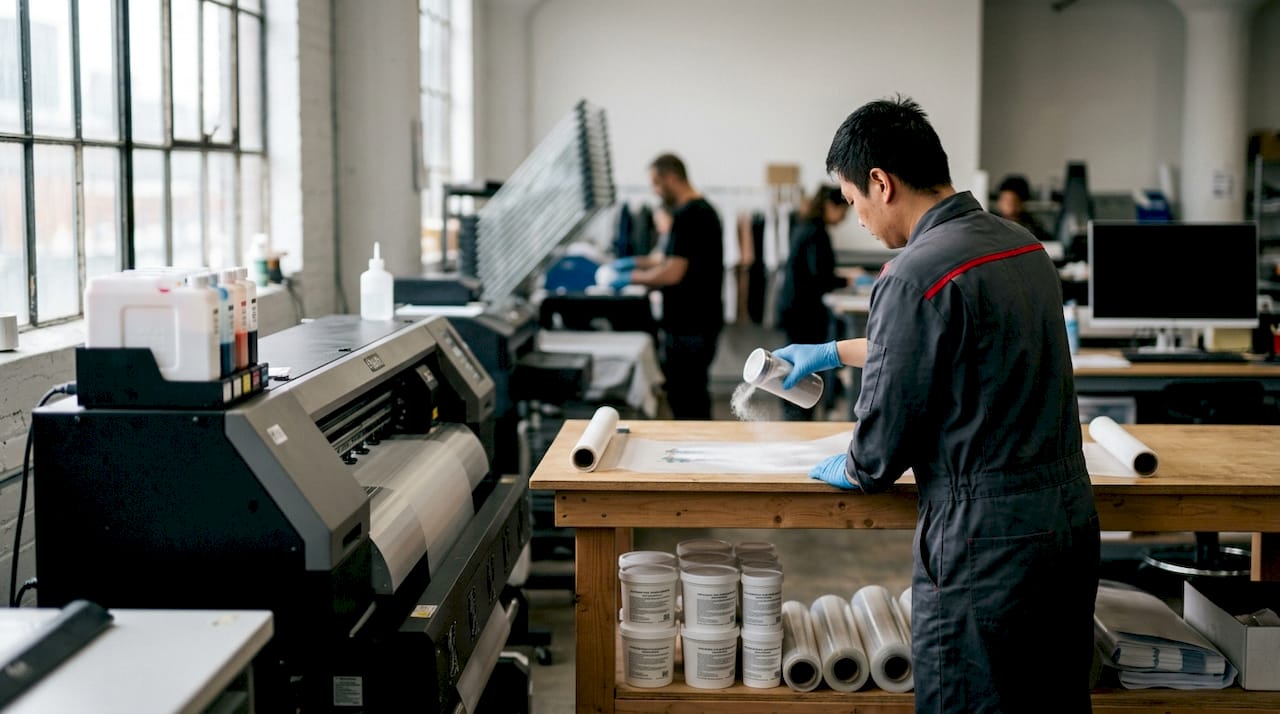
- Apply adhesive powder. Coat the wet ink surface evenly with hot-melt adhesive powder. Shake off all excess. Uneven powder application causes clumps that create texture problems after pressing.
- Cure the powder. Pass the film through a curing oven or use a heat gun to melt the powder into a smooth, even layer. Proper curing temperature and time vary by powder type. Follow the manufacturer’s specification.
- Heat press the transfer. Press the cured film onto the garment at 150–170°C for 10–15 seconds, applying firm, even pressure. After the main press, do a finishing press for 5 seconds with a silicone sheet or parchment paper to smooth the surface.
- Peel the film. Peel hot or cold depending on your film type. Hot-peel films release immediately after pressing and preserve fine details. Cold-peel films require cooling before removal and typically produce a slightly matte finish.
Wash durability for properly pressed DTF transfers approximates 30 wash cycles at 40°C with correct pressing and care instructions followed. That figure drops sharply if pressing temperature or time is off by even a small margin.
| Stage | Key Parameter |
|---|---|
| Film loading | Coated side toward printhead |
| Print order | CMYK color first, white underbase second |
| Powder curing | Per manufacturer temperature and time spec |
| Heat press | 150–170°C, 10–15 seconds |
| Finishing press | 5 seconds with silicone sheet |
| Peel method | Hot-peel or cold-peel per film type |
Pro Tip: Always do a test press on a scrap piece of the same fabric before pressing a finished order. Fabric thickness and fiber content affect heat transfer and can require small adjustments to time or pressure.
For a deeper look at how DTF compares to traditional methods, the DTF vs screen printing breakdown covers cost and workflow differences in practical terms.
What causes common DTF print problems and how do you fix them?
Print consistency problems arise most often from consumable mismatches or RIP software misconfigurations, not from hardware failure. Understanding the root cause of each defect saves time and material.
- White halos around designs. Caused by residual white pixels in the artwork’s transparent areas. Fix by checking your file in a design program with a dark background visible. Clean up any semi-transparent edges using masking tools.
- Color mismatches between screen and print. Caused by missing or incorrect color profiles. Fix by embedding Coated FOGRA39 and enabling soft-proofing before finalizing artwork.
- Clumpy or flaky powder texture. Caused by uneven powder application or insufficient shaking off of excess. Fix by applying powder in a thin, even coat and tapping the film firmly to remove loose material before curing.
- Print adhesion failures or early peeling. Caused by under-pressing, incorrect temperature, or pressing on a fabric with a moisture-wicking finish. Fix by verifying heat press calibration and testing on the specific fabric type.
- White ink clogging. White ink pigment sedimentation is the primary maintenance concern. Fix by running daily ink circulation cycles and nozzle checks. Neglecting this routine is the leading cause of printhead failure in DTF systems.
Proper workflow integration, not just the quality of the printer, determines final DTF print quality. Focus on consumables and RIP software calibration for consistent results across every run.
Pro Tip: Keep a print log for each job: film batch, powder brand, press temperature, and press time. When a defect appears, the log tells you exactly what changed.
Common design mistakes on custom apparel often trace back to artwork errors rather than equipment problems. Reviewing your file setup before printing eliminates the majority of these issues.
Best practices for professional full-color DTF printing results
The best full-color DTF results come from treating the entire production chain as a system. Ink quality, film, powder uniformity, curing parameters, and heat press calibration all interact. Optimizing one element while ignoring another produces inconsistent output.
- Use 8-color or 9-color extended gamut ink setups when brand color accuracy is critical. These systems add orange, green, and violet channels to standard CMYK, reaching vibrant magentas and Pantone-adjacent tones that standard four-color DTF cannot reproduce.
- Run daily white ink circulation and nozzle checks without exception. White ink settles faster than any other pigment and clogs printheads silently.
- Control your print environment. Temperature and humidity affect ink viscosity, powder adhesion, and curing consistency. A stable room at moderate humidity produces more repeatable results than the same printer in a fluctuating space.
- Source consumables from a single supplier when possible. Mixing powder brands or film types from different manufacturers introduces variables that are hard to isolate when troubleshooting.
- Use calibrated RIP software and save profiles for each fabric type you print on regularly. A saved profile for 100% cotton, one for polyester blends, and one for performance fabrics eliminates guesswork on repeat orders.
DTF printing enables short-to-medium run production without screen setup costs, making it the practical choice for demand-driven custom apparel. A single design file can print one shirt or one hundred without any setup change.
Pro Tip: Invest in a quality RIP software license rather than relying on free or bundled options. Calibrated RIP profiles are the single biggest lever for color accuracy and print consistency in a DTF workflow.
Key Takeaways
Full-color DTF printing delivers professional, durable results only when artwork preparation, equipment calibration, and finishing workflow are all executed correctly.
| Point | Details |
|---|---|
| Artwork resolution and format | Use 300 DPI PNG or TIFF with transparent background and Coated FOGRA39 profile embedded. |
| Color management | Convert to CMYK and use soft-proofing to prevent color shifts between screen and print. |
| Heat press parameters | Press at 150–170°C for 10–15 seconds, then finish with a 5-second silicone press. |
| White ink maintenance | Run daily circulation and nozzle checks to prevent sedimentation and printhead clogging. |
| Workflow as a system | Consumable quality and RIP calibration matter more than printer hardware alone. |
What working with full-color DTF has taught me about getting it right
The biggest misconception I see is that DTF printing is plug-and-play once you have the equipment. It is not. Color management alone takes real time to understand. The gap between what a design looks like on screen in RGB and what it prints in CMYK is wider than most people expect. The first time you see a vibrant electric blue print as a dull gray-blue on a shirt, it sticks with you. After that, you never skip soft-proofing again.
White ink maintenance is the other thing people underestimate until it costs them a printhead. Daily circulation is not optional. It takes five minutes and saves hundreds of dollars. The printers that produce consistent output week after week are the ones with disciplined operators, not necessarily the most expensive hardware.
What I find genuinely exciting about full-color DTF is the design freedom it gives small operations. A single-piece custom order with a photographic print, fine gradients, and text on a dark hoodie is completely achievable without minimum order requirements or screen costs. That flexibility changes what is possible for small businesses, event organizers, and independent designers. The economics work at quantities where screen printing simply does not.
My recommendation: start with a well-prepared file, calibrate your heat press with a thermometer, and keep a print log from day one. The learning curve is real, but it is short when you approach it systematically.
— Toronto
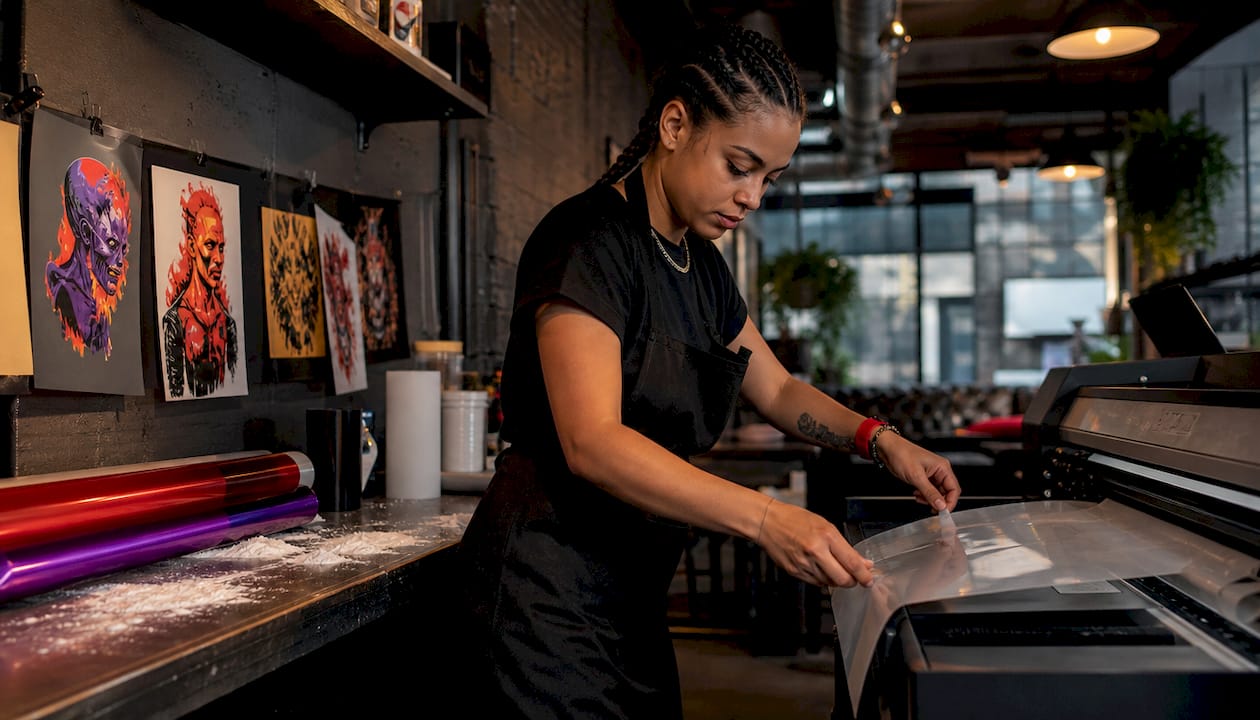
Full-color DTF printing services from Torontocustomtshirts
Torontocustomtshirts delivers photo-quality DTF printing for custom apparel across Toronto, Mississauga, and the GTA. Whether you need a single custom shirt or a bulk branded order, the team handles artwork support, full-color transfers, and fast turnaround from one location.
Orders of any size are welcome, from one-off event shirts to corporate uniform runs. The process is straightforward: submit your artwork, confirm your garment, and pick up locally in Mississauga or arrange delivery across the GTA. For businesses managing bulk apparel orders, Torontocustomtshirts offers flexible pricing and experienced production support at every step. Visit torontocustomtshirts.ca to get started.
FAQ
What is DTF printing and how does it work?
DTF, or Direct-to-Film printing, transfers full-color designs onto fabric using a printed film, adhesive powder, and a heat press. The process works on nearly any fabric type without pre-treatment.
What file format works best for DTF printing?
PNG with a transparent background at 300 DPI is the standard format for DTF artwork. TIFF is also acceptable for maximum color depth.
Can DTF printing handle photographic images and gradients?
DTF printing supports continuous tone printing, making it well-suited for photographic images and smooth gradients without banding or color breaks.
How durable are DTF transfers after washing?
Properly pressed DTF transfers hold up for approximately 30 wash cycles at 40°C when care instructions are followed. Incorrect pressing temperature or time reduces durability significantly.
What causes white halos around DTF designs on dark shirts?
White halos result from residual white pixels in the artwork’s transparent areas. Fixing the file with clean masking and a fully transparent background at 0% opacity eliminates the problem.
Recommended
Get pricing in 24h.
Toronto-based, no minimums. Tell us about your project and we'll email a detailed quote within one business day.
Request a Quote